
Zero Trust Access with Cloudflare
Since its inception, remote work has relied on fundamentally having a VPN client installed on a device. A user authenticates at the perimeter and once they’re through, they’re on the network - trusted and free to move (!). This model made sense when applications and users all lived inside the corporate walls but it doesn’t anymore. Applications have moved to the Cloud, users work from anywhere (including the beach) and the trusted internal network has become the single biggest liability in enterprise security - a stolen credential or compromised device and an attacker is inside, able to move laterally toward whatever they’re after to deploy ransomware (network-wide access spreads ransomeware to everything the attacker can reach) and data exfiltration.
This project was created to demonstrate the alternative Zero Trust access model, built with Cloudflare. Instead of placing a user on a network, it connects an authenticated user to one specific application and nothing else. The application is never exposed to the Internet - it sits behind an outbound-only tunnel with no inbound ports to scan or attack. Every request is checked against identity and policy before access is granted (and everyone else is denied by default). The result is secure access to a private resource with no attack surface, no lateral movement and without a VPN in sight.
How it works
~
How it works ~
Using Cloudflare One for SASE
Cloudflare has a suite of products with their original pitch being to make any internet property faster and more secure without installing hardware or changing code. They started out as a CDN (content delivery network). Instead of every visitor loading a website from one main computer (origin server), the CDN serves copies from a nearby location. This makes sites load faster, reduces load on the origin and blocks cyber attacks. Cloudflare can do this thanks to their global network that sits inline between users and everything they access.
The same inline network is used to power the Cloudflare One platform (their answer to Zero Trust) which we’ll be utilising for this project. It replaces VPNs with a cloud-delivered model.
This website (perrycyber.com) is registered with GoDaddy and hosted on Squarespace (two-provider setup). Adding Cloudflare's tunnel to that domain would have introduced a third provider into the DNS chain with each handoff (GoDaddy → Cloudflare → Squarespace) a point where a misconfiguration could take the site offline or break its SSL. Rather than risk a working site for a test project, I registered a separate domain directly through Cloudflare. Registering at Cloudflare means DNS is managed there natively. Thus, zt-test-brian.com was conceived.
The Cloudflared Connector
Using the cloudflared-windows-amd64.exe binary obtained from here, we rename it and authenticate it to the Cloudflare account, and establish an outbound-only tunnel that publishes the test service through Cloudflare's edge.
PowerShell’s Rename-Item function to call it something more manageable
Authenticate account and domain. Downloads certificate cert.pm that authorises tunnel to the account
Create named tunnel. The JSON file added under \.cloudflared is the tunnel’s key
This creates a DNS record so app.zt-test-brian.com points at zt-demo tunnel.
Checked for a local web application runtime using node - - version. Node.js not installed but not required because Cloudfalre Tunnel provides a built-in hello_world origin service. No locahost web server, Node.js application or Python HTTP server was needed.
Created a config.yml file in the .cloudflare directory. The tunnel ID, credentials file and ingress rule were defined with the service set to the hello_world origin.
Attempted to start tunnel. Terminal reported that config.yml was empty because the file contents had not been saved. Going back to save the YAML config in Notepad had the tunnel successfully start.
Populated and saved config.yml and the tunnel was started again using cloudflared tunnel run zt-demo. Connectivity pre-checks passed for DNS resolution, UDP, TCP and Cloudflare API reachability, tunnel was successfully established and connected to Cloudflare's edge. The output also confirmed that QUIC would be used as the primary transport protocol.
tunnel: f48ac995-558e-4a79-a039-cbfb90fb0b04
credentials-file: C:\Users\bperry\.cloudflared\f48ac995-558e-4a79-a039-cbfb90fb0b04.json

ingress:
  - hostname: app.zt-test-brian.com
  - service: hello_world
  - service: http_status:404
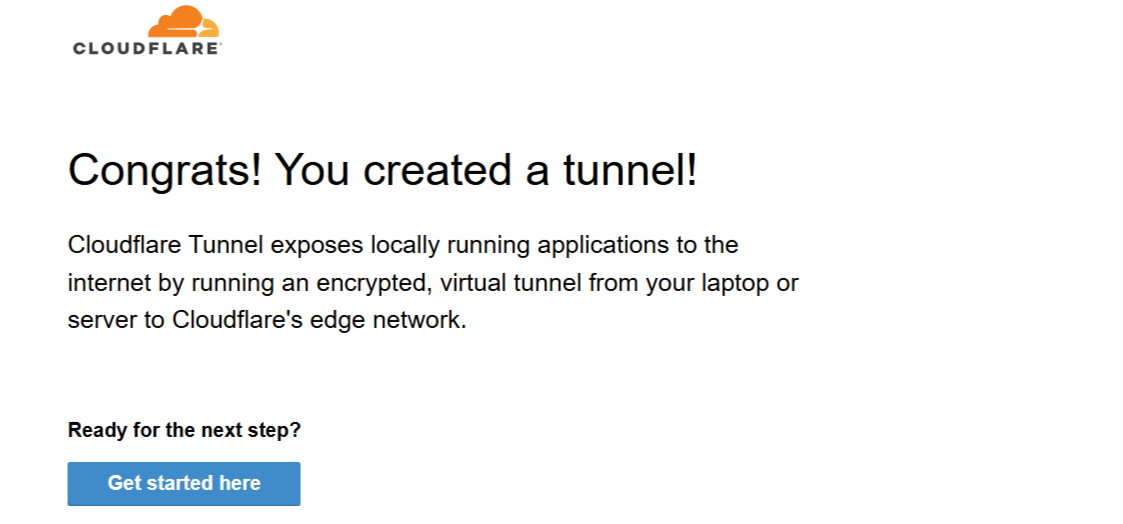
Now the tunnel’s live. “Congrats! You created a tunnel!” on the hello-world page means the whole path is operational (my machine → outbound tunnel → Cloudflare's edge → app.zt-test-brian.com) with no inbound ports opened on the network.
Putting it all together
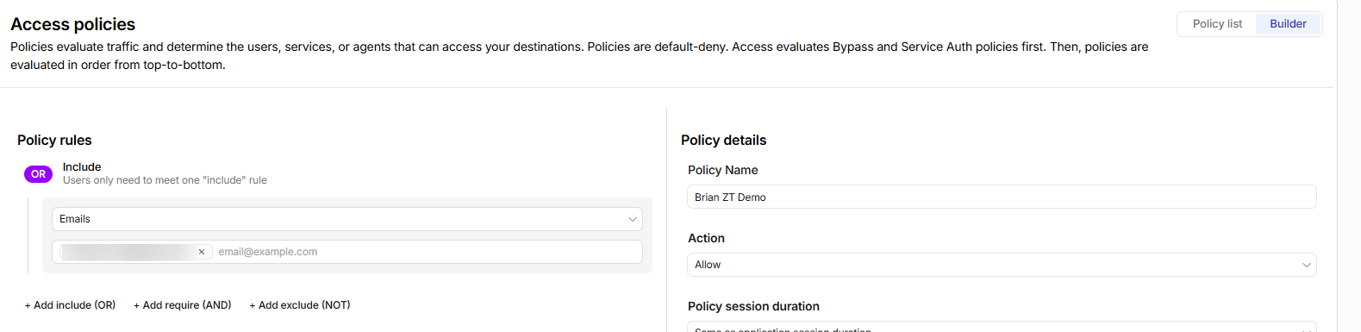
If you’re able to access app.zt-test-brian.com, it means I haven’t done a good job. I’ve only defined access to my personal account so I can navigate to the hostname, login and see the “You created a tunnel!” message. If the access policies don’t define the email address or domain that the visitor uses to sign in, they’re met with “Cloudflare sign-in is restricted to members of the account”.
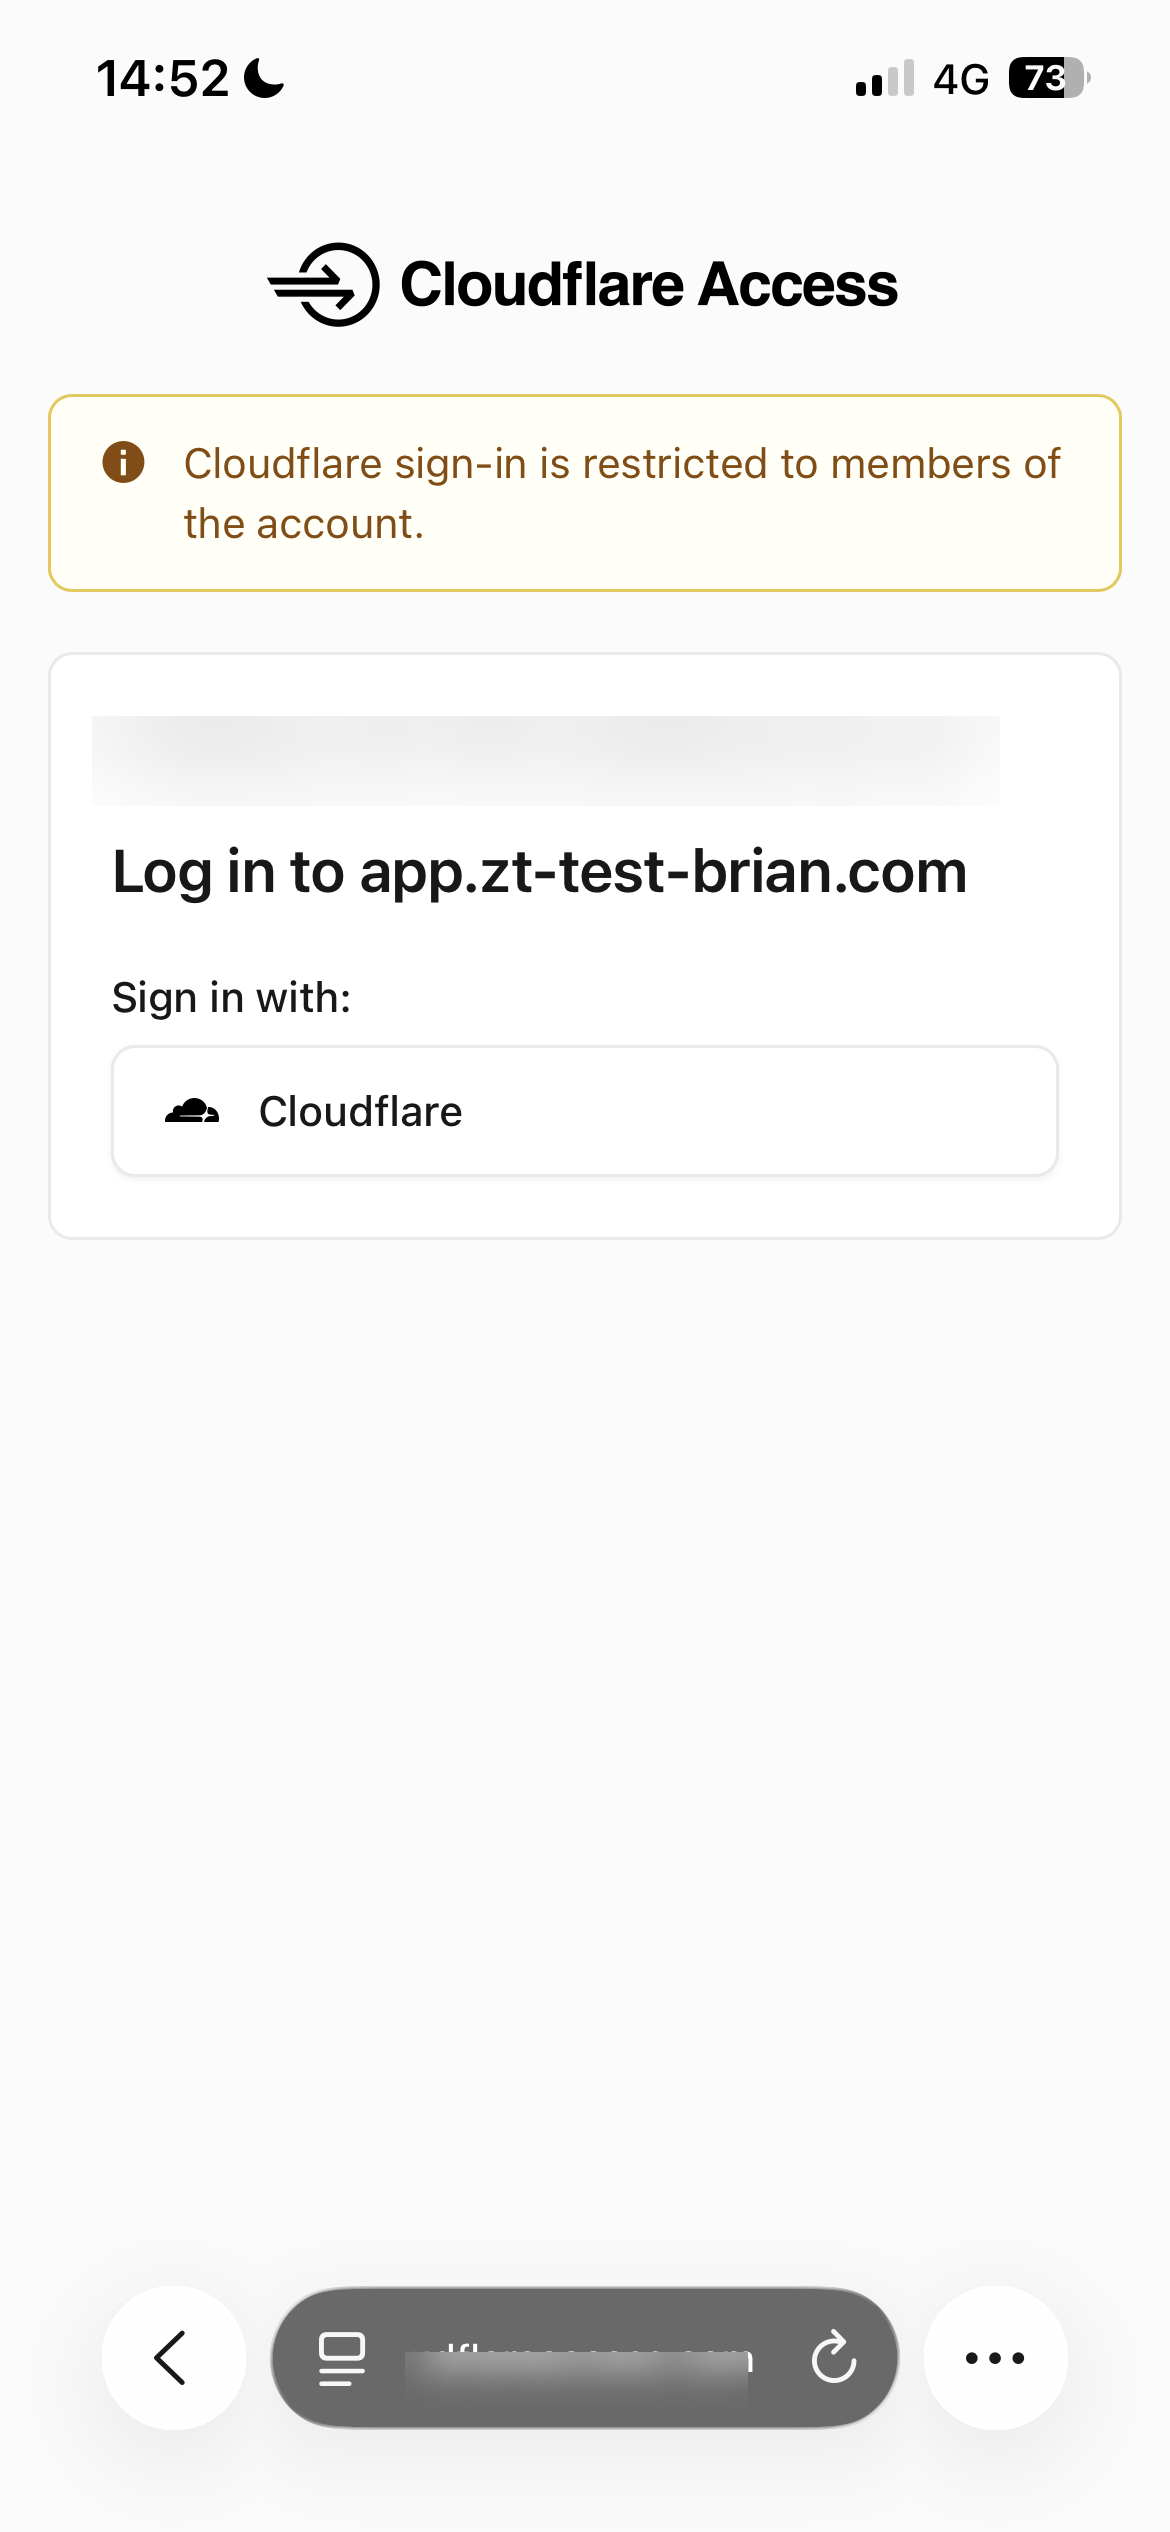
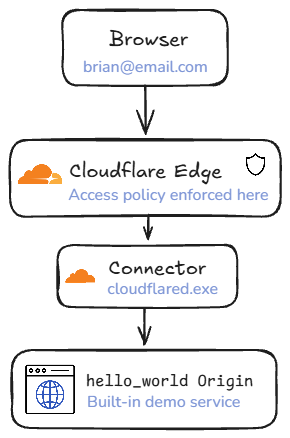
An internal app published to the internet with zero open ports, successfully
2026-08-10T10:13:26Z INF Version 2026.7.2 (Checksum cdb5d4432f6ae1595654a692a51308b69d2bf7af961f5578d9391837cf072df9)
2026-08-10T10:13:26Z INF GOOS: windows, GOVersion: go1.26.4, GoArch: amd64
2026-08-10T10:13:26Z INF Generated Connector ID: 7e8b23b9-af4b-4665-b8da-e32a00223385
2026-08-10T10:13:26Z WRN No ingress rules were defined in provided config (if any) nor from the cli, cloudflared will return 503 for all incoming HTTP requests
2026-08-10T10:13:26Z INF Initial protocol quic
2026-08-10T10:13:26Z INF ICMP proxy will use 10.177.203.209 as source for IPv4
2026-08-10T10:13:26Z INF ICMP proxy will use fe80::bf57:330d:5903:ede0 in zone Wi-Fi as source for IPv6
2026-08-10T10:13:26Z INF ICMP proxy will use 10.177.203.209 as source for IPv4
2026-08-10T10:13:26Z INF Tunnel connection curve preferences: [X25519MLKEM768 CurveID(65074) CurveP256] connIndex=0 event=0 ip=198.41.200.43
2026-08-10T10:13:26Z INF ICMP proxy will use fe80::bf57:330d:5903:ede0 in zone Wi-Fi as source for IPv6
2026-08-10T10:13:26Z INF Starting metrics server on 127.0.0.1:20241/metrics
2026-08-10T10:13:26Z INF +------------------------------------------------------------------------------------+
2026-08-10T10:13:26Z INF |                              CONNECTIVITY PRE-CHECKS                                |
2026-08-10T10:13:26Z INF +------------------------------------------------------------------------------------+
2026-08-10T10:13:26Z INF | COMPONENT         TARGET                     STATUS  DETAILS                       |
2026-08-10T10:13:26Z INF | DNS Resolution    region1.v2.argotunnel.com  PASS    DNS Resolved successfully     |
2026-08-10T10:13:26Z INF | DNS Resolution    region2.v2.argotunnel.com  PASS    DNS Resolved successfully     |
2026-08-10T10:13:26Z INF | UDP Connectivity  region1.v2.argotunnel.com  PASS    QUIC connection successful    |
2026-08-10T10:13:26Z INF | UDP Connectivity  region2.v2.argotunnel.com  PASS    QUIC connection successful    |
2026-08-10T10:13:26Z INF | TCP Connectivity  region1.v2.argotunnel.com  PASS    HTTP/2 connection successful  |
2026-08-10T10:13:26Z INF | TCP Connectivity  region2.v2.argotunnel.com  PASS    HTTP/2 connection successful  |
2026-08-10T10:13:26Z INF | Cloudflare API    api.cloudflare.com:443     PASS    API is reachable              |
2026-08-10T10:13:26Z INF |                                                                                    |
2026-08-10T10:13:26Z INF | SUMMARY: Environment is healthy. cloudflared will use 'quic' as primary protocol.  | 8
2026-08-10T10:13:26Z INF +------------------------------------------------------------------------------------+
2026-08-10T10:13:26Z INF precheck component="DNS Resolution" details="DNS Resolved successfully" run_id=02521757-33ef-4b33-bb36-8d997197d64e status=pass target=region1.v2.argotunnel.com
2026-08-10T10:13:26Z INF precheck component="DNS Resolution" details="DNS Resolved successfully" run_id=02521757-33ef-4b33-bb36-8d997197d64e status=pass target=region2.v2.argotunnel.com
2026-08-10T10:13:26Z INF precheck component="UDP Connectivity" details="QUIC connection successful" run_id=02521757-33ef-4b33-bb36-8d997197d64e status=pass target=region1.v2.argotunnel.com
2026-08-10T10:13:26Z INF precheck component="UDP Connectivity" details="QUIC connection successful" run_id=02521757-33ef-4b33-bb36-8d997197d64e status=pass target=region2.v2.argotunnel.com
Configuring ZTNA Controls
But right now, anyone on the internet can reach that page. There’s no access policies implemented yet.
This is where the important stuff happens. Users can be defined by
Email address or email domain (e.g. only @perrycyber.com users)
Identity provider groups (Microsoft Entra ID, Okta, Google, etc.)
Multi-factor authentication
Device posture checks (managed device, WARP installed, OS compliance)
Geographic restrictions (country-based access)
IP allowlists and denylists
Service tokens for non-human or application access
Time-based access controls
Default-deny policies with allow, block, bypass, and service-auth action
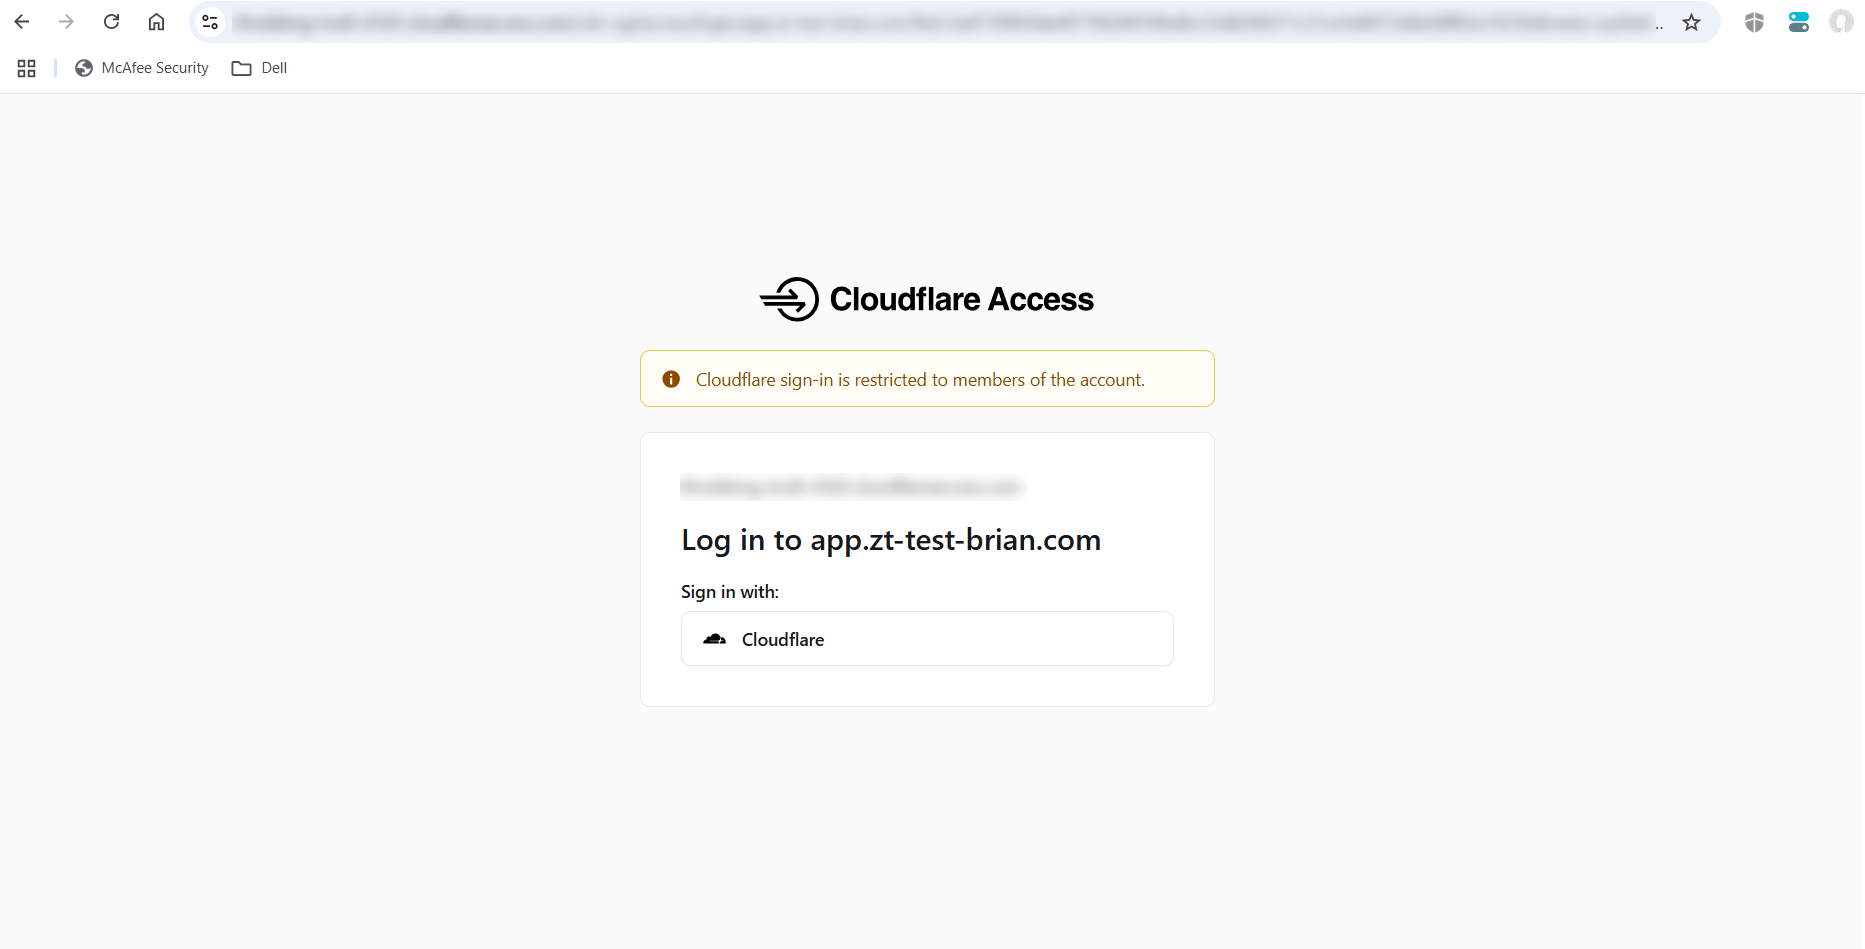
Displayed after user enters their login details and the access policies don’t allow their identity
Mobile devices aren’t exempt from access policies either

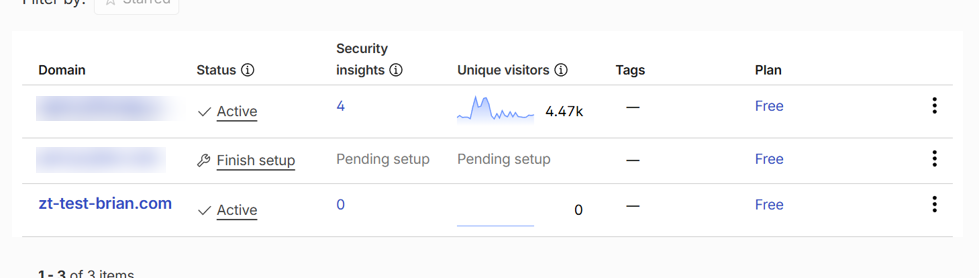
Other domains currently being managed under my Cloudflare account. After purchasing through their website, the test domain is Active
PS C:\Users\bperry\Downloads> .\cloudflared-windows-amd64.exe --version
cloudflared version 2026.7.2 (built 2026-07-15T04:01 UTC)
PS C:\Users\bperry\Downloads> Rename-Item cloudflared-windows-amd64.exe cloudflared.exe 1
PS C:\Users\bperry\Downloads> .\cloudflared.exe --version
cloudflared version 2026.7.2 (built 2026-07-15T04:01 UTC)
PS C:\Users\bperry\Downloads> .\cloudflared.exe tunnel login 2
A browser window should have opened at the following URL:

https://dash.cloudflare.com/argotunnel?aud=&callback=https%3A%2F%2Flogin.cloudflareaccess.org%2FZ6h2l0kPk_Lib8vVRfgQYWsnOD03Ono5TwxnyeAHlk%3D

If the browser failed to open, please visit the URL above directly in your browser.
2026-08-10T10:03:47Z INF Waiting for login...
2026-08-10T10:03:48Z INF You have successfully logged in.
If you wish to copy your credentials to a server, they have been saved to:
C:\Users\bperry\.cloudflared\cert.pem

PS C:\Users\bperry\Downloads> .\cloudflared.exe tunnel create zt-demo 3
Tunnel credentials written to C:\Users\bperry\.cloudflared\f48ac995-558e-4a79-a039-cbfb90fb0b04.json. cloudflared chose this file based on
where your origin certificate was found. Keep this file secret. To revoke these credentials, delete the tunnel.

Created tunnel zt-demo with id f48ac995-558e-4a79-a039-cbfb90fb0b04
2026-08-10T10:05:07Z WRN Your version 2026.7.2 is outdated. We recommend upgrading it to 2026.7.3
PS C:\Users\bperry\Downloads> .\cloudflared.exe tunnel route dns zt-demo app.zt-test-brian.com 4
2026-08-10T10:07:36Z INF Added CNAME app.zt-test-brian.com which will route to this tunnel tunnelID=f48ac995-558e-4a79-a039-cbfb90fb0b04
PS C:\Users\bperry\Downloads> node --version 5
node : The term 'node' is not recognized as the name of a cmdlet, function, script file, or operable program. Check the spelling of the
name, or if a path was included, verify that the path is correct and try again.

At line:1 char:1
+ node --version
+ ~~~~
    + CategoryInfo          : ObjectNotFound: (node:String) [], CommandNotFoundException
    + FullyQualifiedErrorId : CommandNotFoundException

PS C:\Users\bperry\Downloads> notepad C:\Users\bperry\.cloudflared\config.yml 6
PS C:\Users\bperry\Downloads> .\cloudflared.exe tunnel run zt-demo 7
2026-08-10T10:13:25Z ERR Configuration file C:\Users\bperry\.cloudflared\config.yml was empty
2026-08-10T10:13:26Z INF Starting tunnel tunnelID=f48ac995-558e-4a79-a039-cbfb90fb0b04
PS C:\Users\bperry\Downloads>

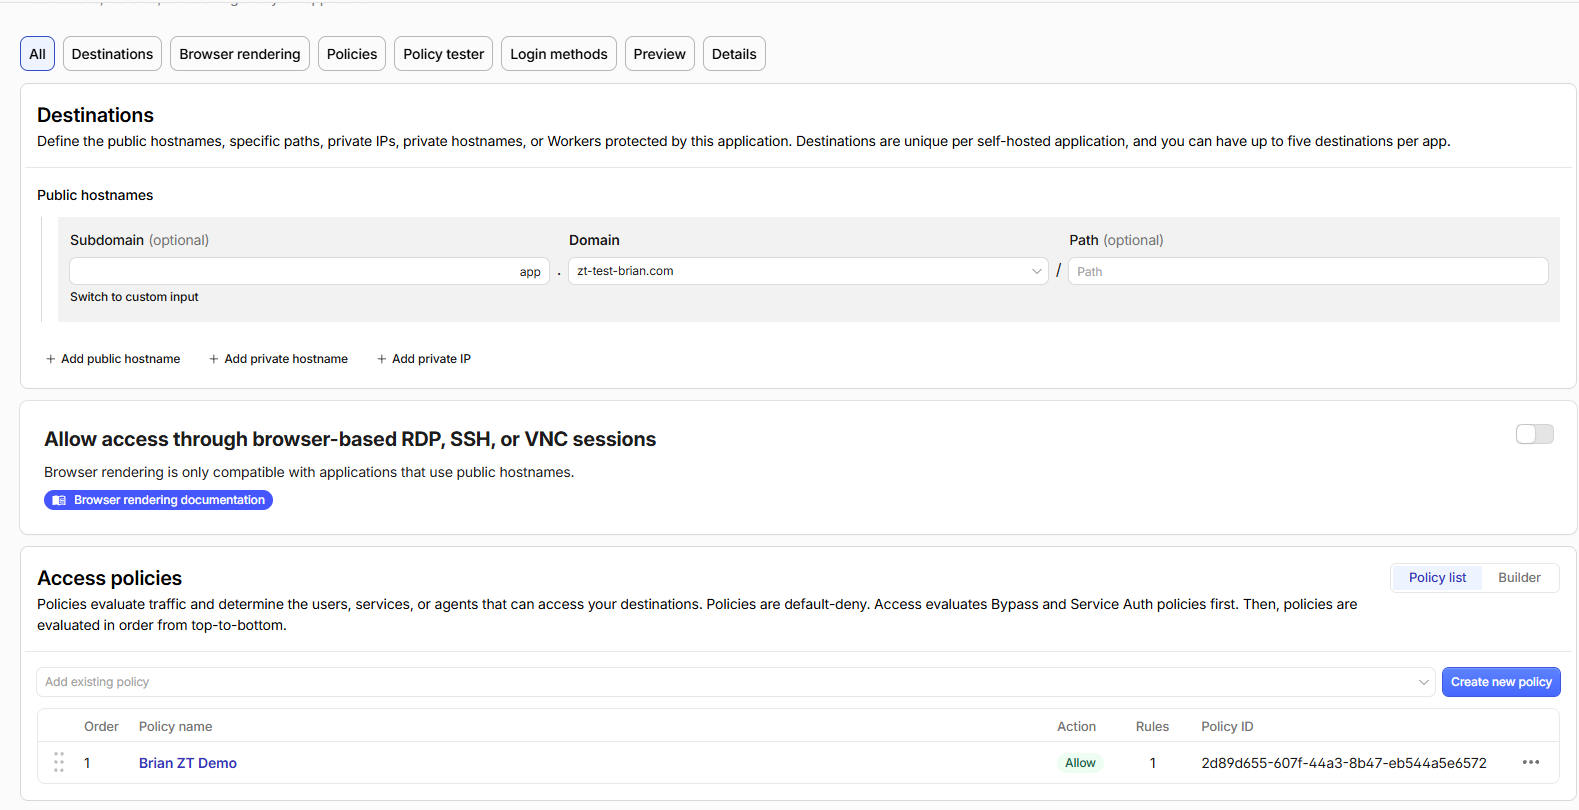
Zero Trust enforcement: the tunnel exposes the app, the Access policy decides who gets in
Private or public?
Private (private destination, routed via Cloudflare Tunnel):
Users access the test app through public hostname app.zt-test-brian.com but the origin itself is never exposed to the Internet. Cloudflare Tunnel brokers an outbound-only connection between Cloudflare’s edge and the private origin using the cloudflared connector, eliminated the need for a public IP address, inbound firewall rules or NAT rules. Access policies are configured through Cloudflare One.
Public (public DNS destination protected by Cloudflare Access):
The app is already internet-accessible and Cloudflare Access would be used as an added authentication layer. It improves seucrity but the origin remains publicly reachable and we all know, if you can reach it, you can breach it. This doesn’t fully demonstrate the Zero Trust principle of hiding infrastructure and verifying identity before granting access.
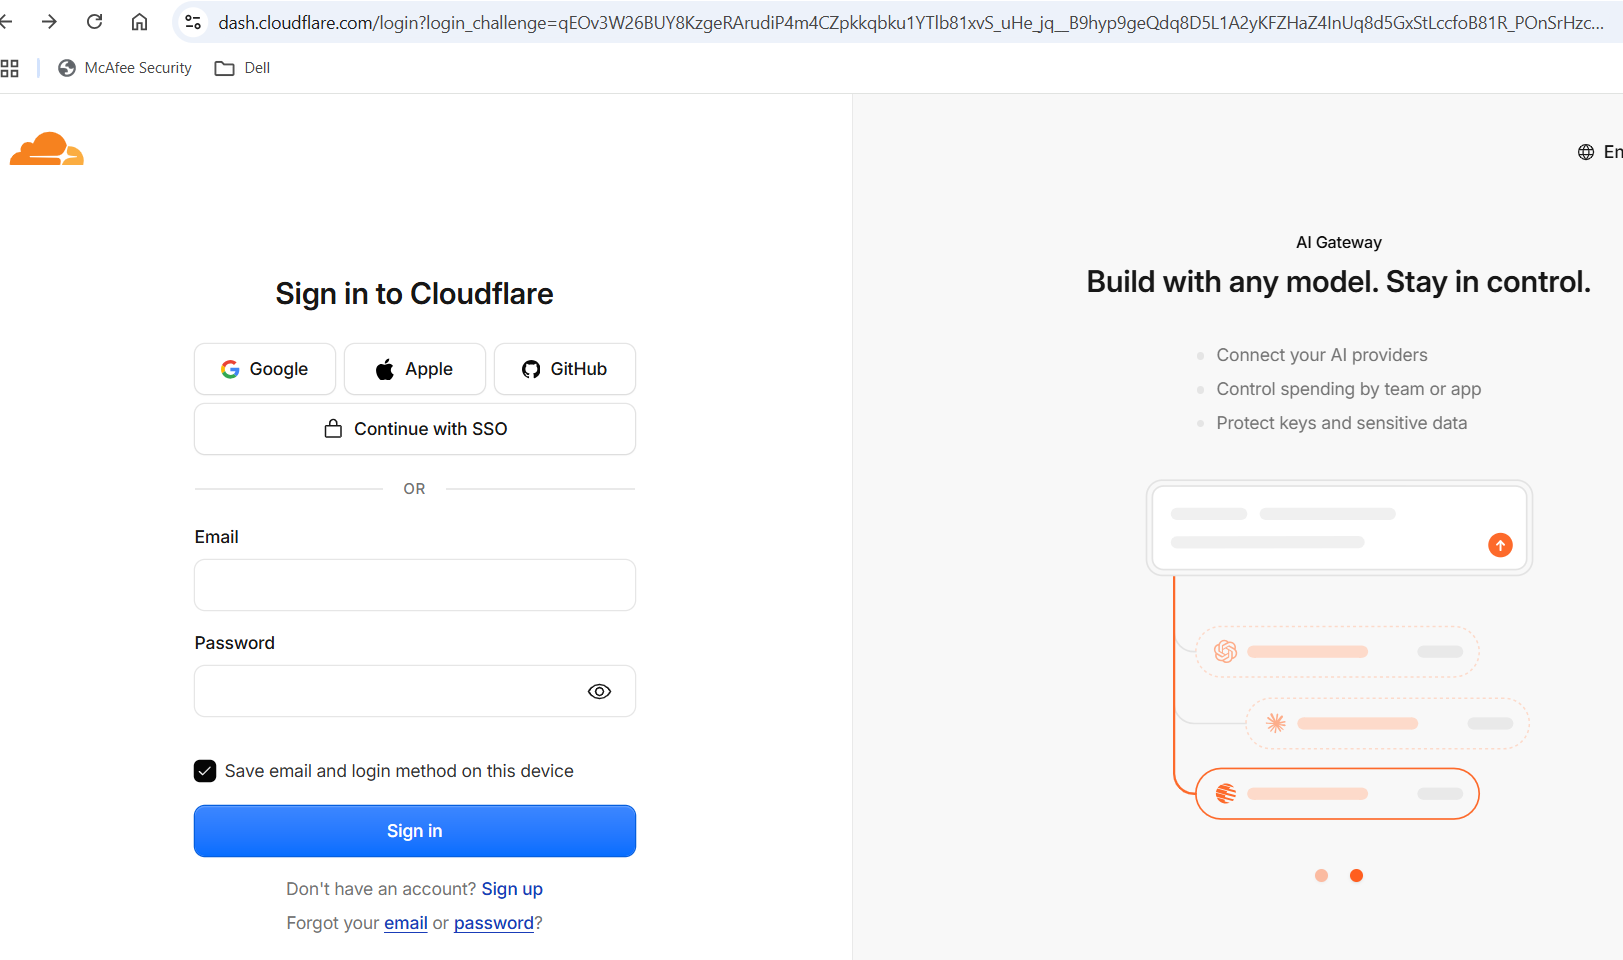
Navigate to hostname app.zt-test-brian.com

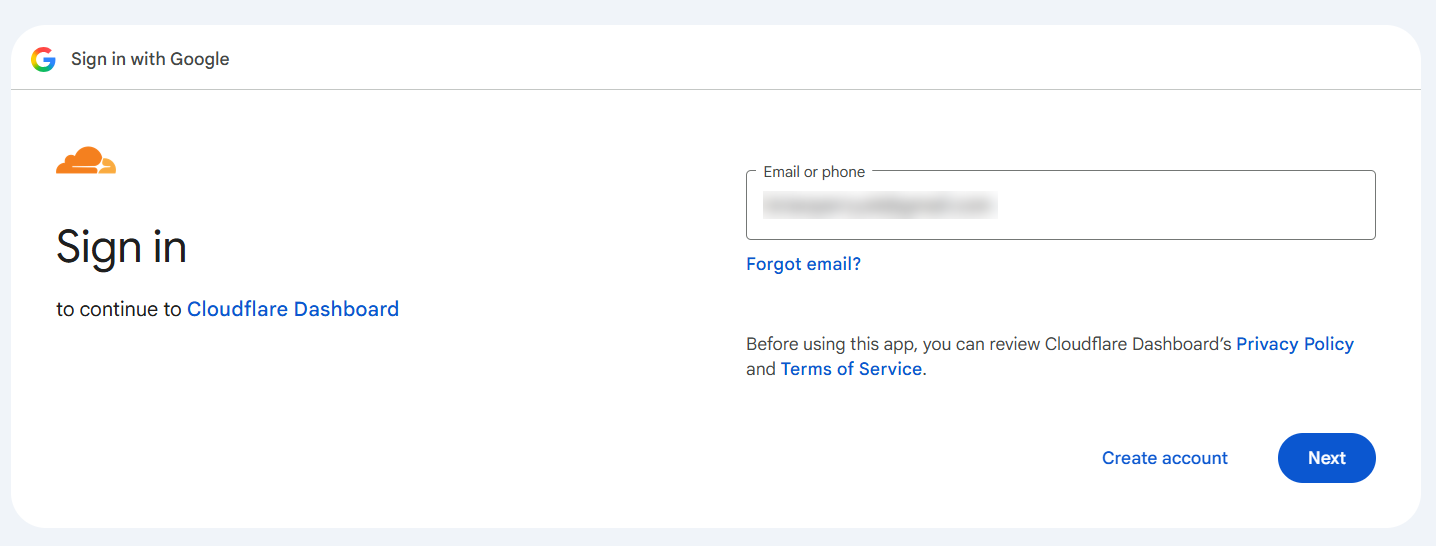
Enter login details, I chose to login via Google
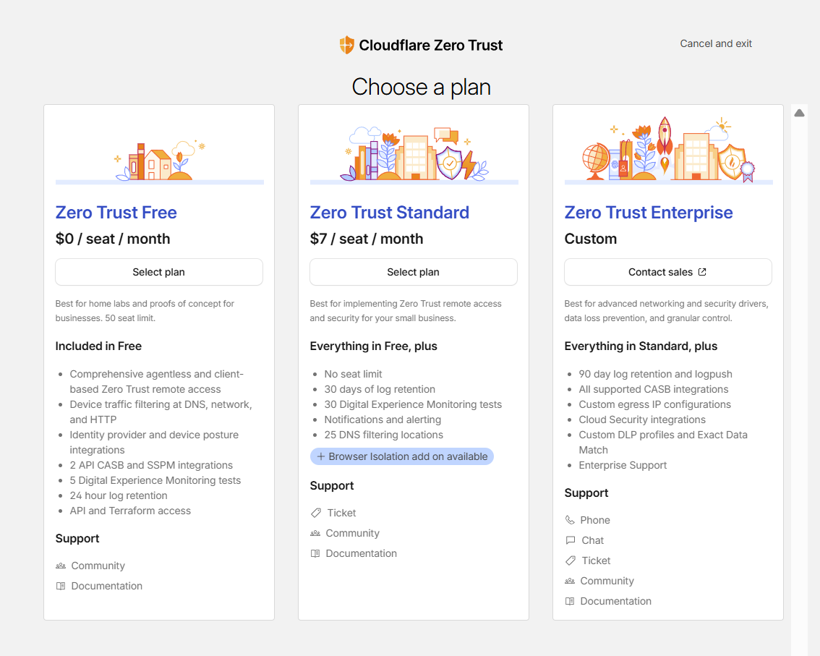
To add access policies, a Zero Trust plan will need to be selected. I went for the free option
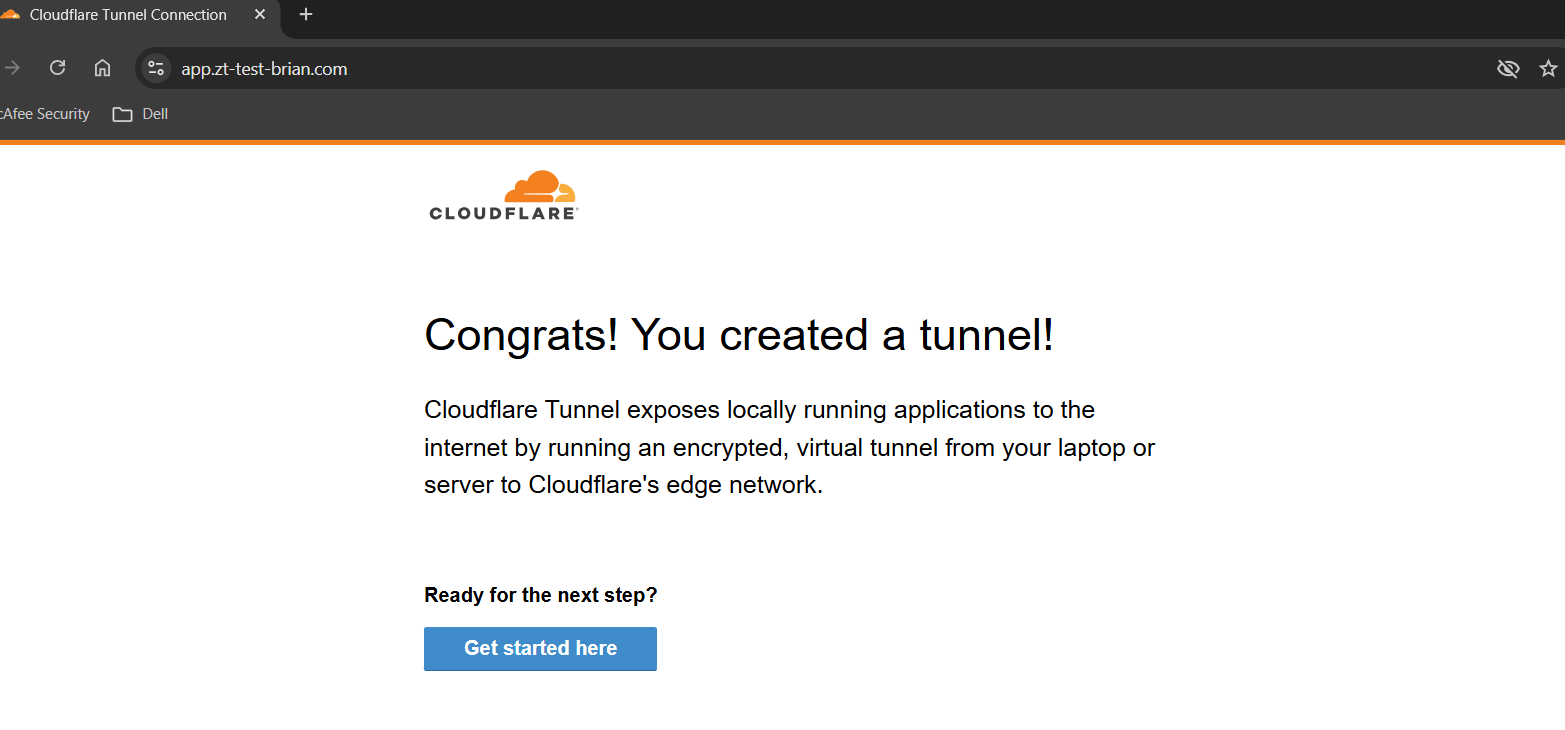
Access policy allows me through and I’m met with the generic landing page. I’m in!